
Whether you’re new to Visual Assist and UE4 or a seasoned vet, we thought you might appreciate a little more insight into what you can expect and how to get started. Thanks to our resident UE4 wizards for putting this together.
Table of Contents
1. Install Visual Assist
- Exit all instances of Visual Studio.
- Run the .exe installer you downloaded.
- Select the IDE(s) you want to install to.
2. Open your game solution
Visual Assist will come alive after it finishes parsing.

3. Look around
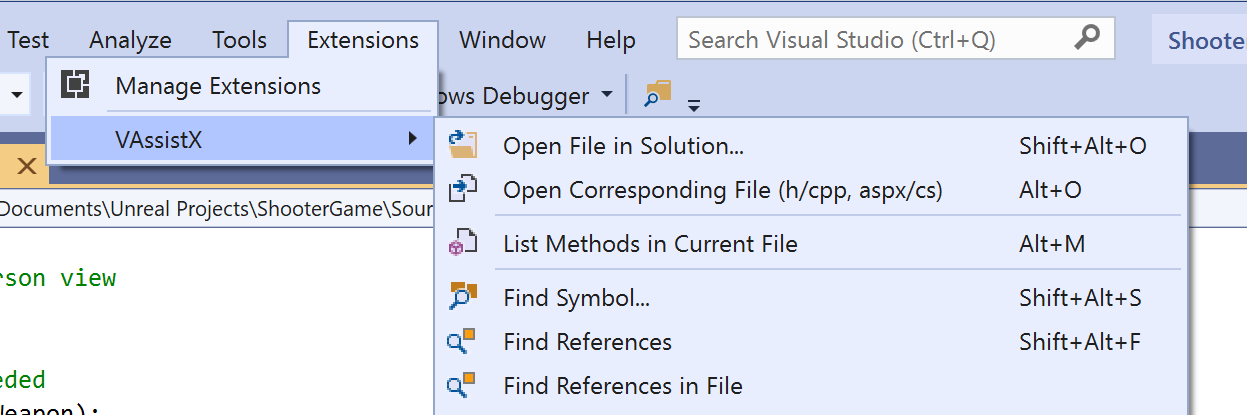
Open the Extensions > VAssistX menu. You will use the menu primarily to open tool windows, review keyboard shortcuts, and access the options dialog.
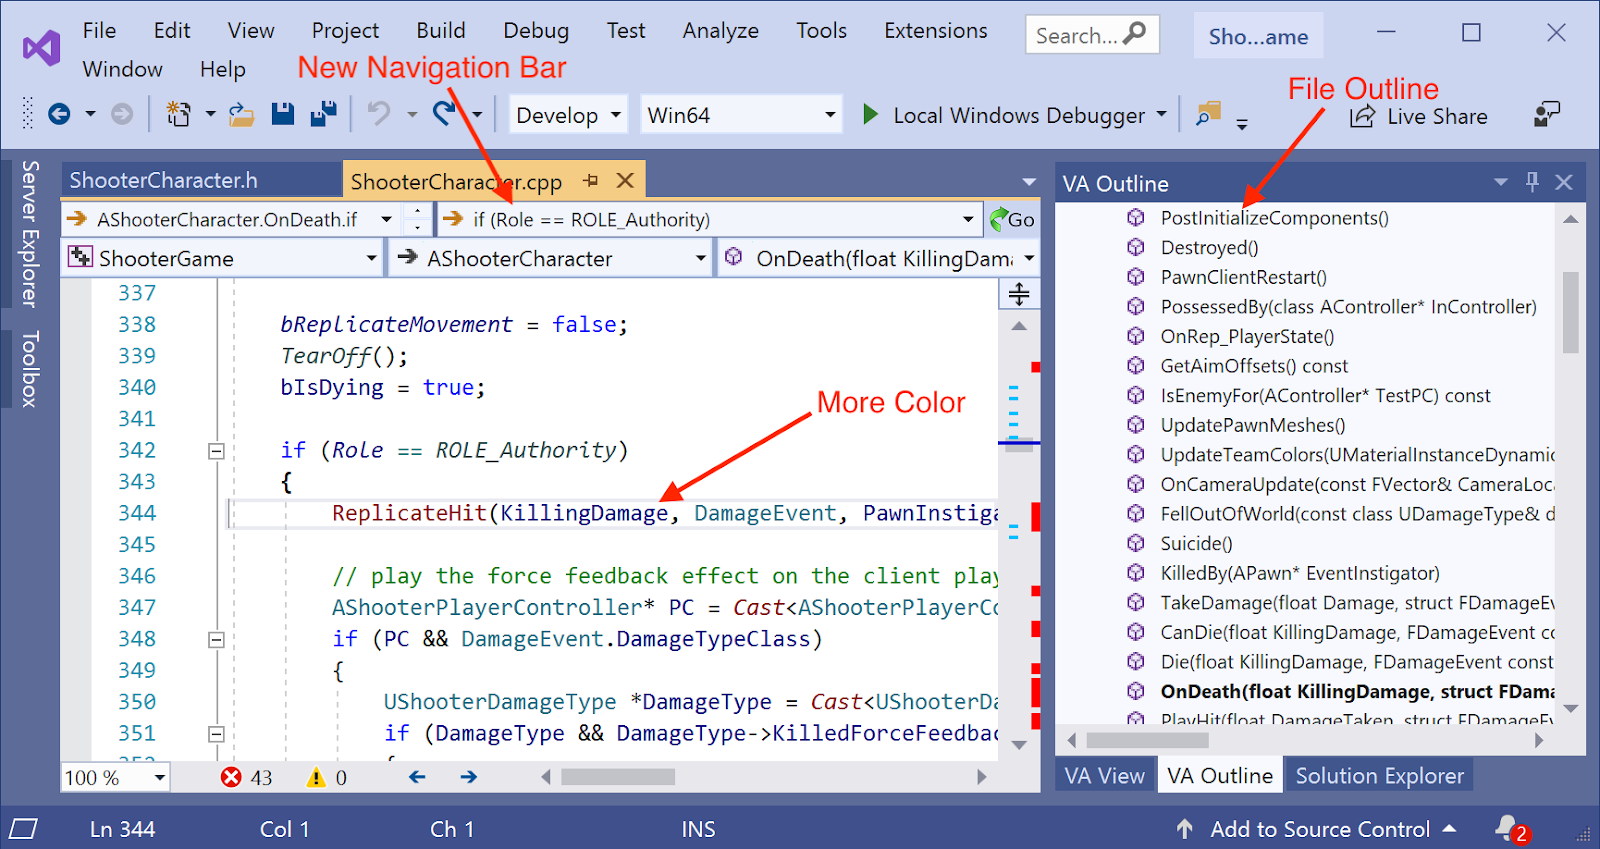
Appreciate the understated UI to Visual Assist. There are just a few visible changes.
4. Change a few settings
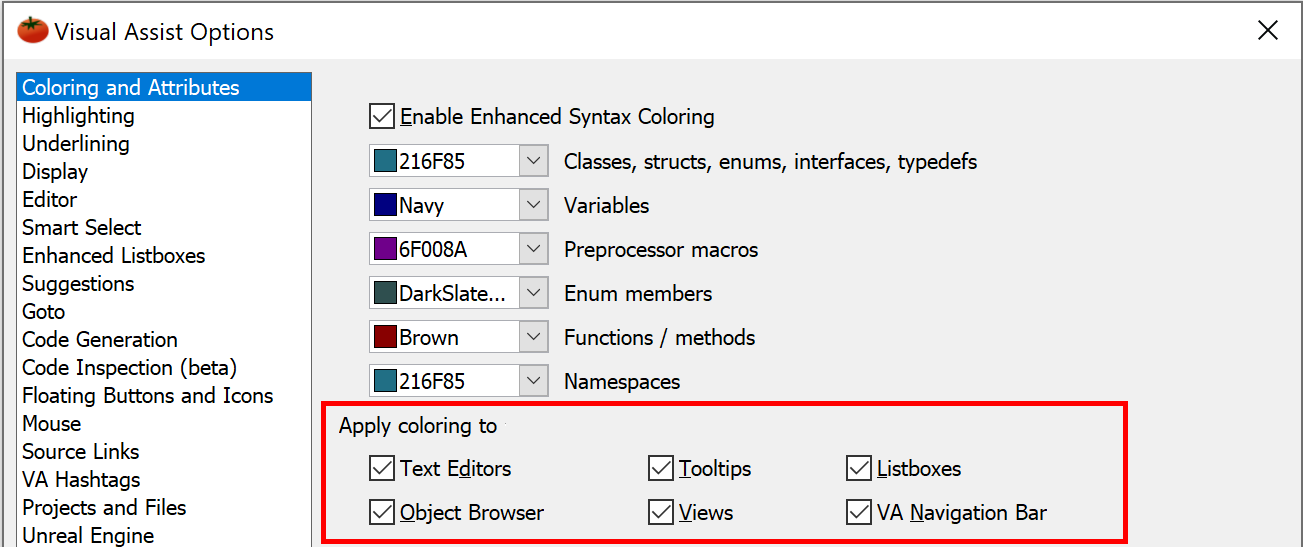
If you like meaningful syntax coloring, open the options dialog for Visual Assist and apply coloring to more of the UI.
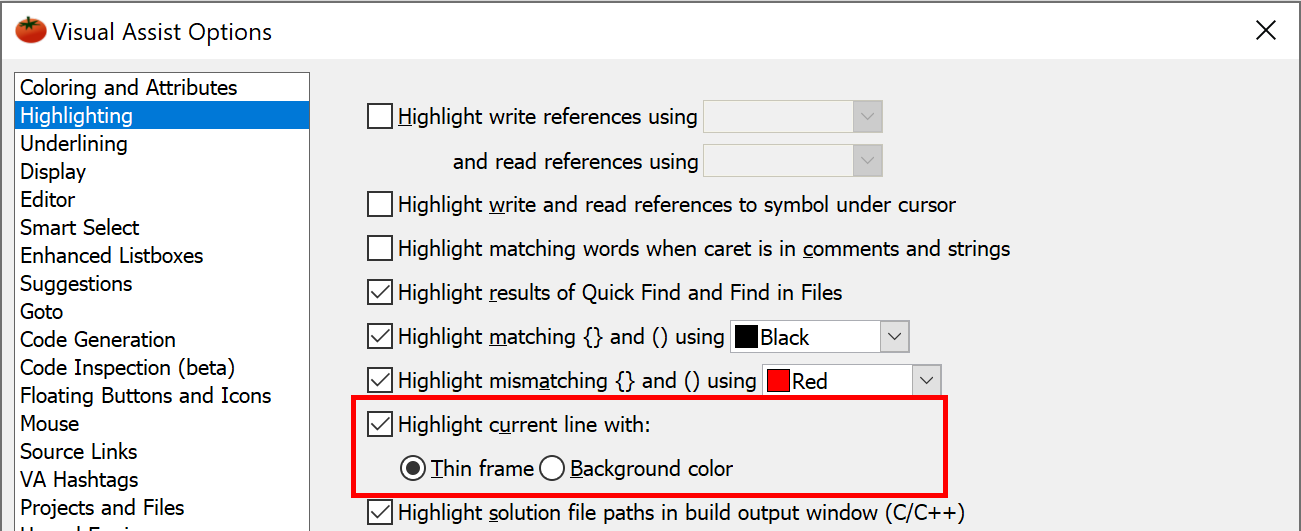
If you highlight the current line, choose a thin frame that doesn’t obscure your code.
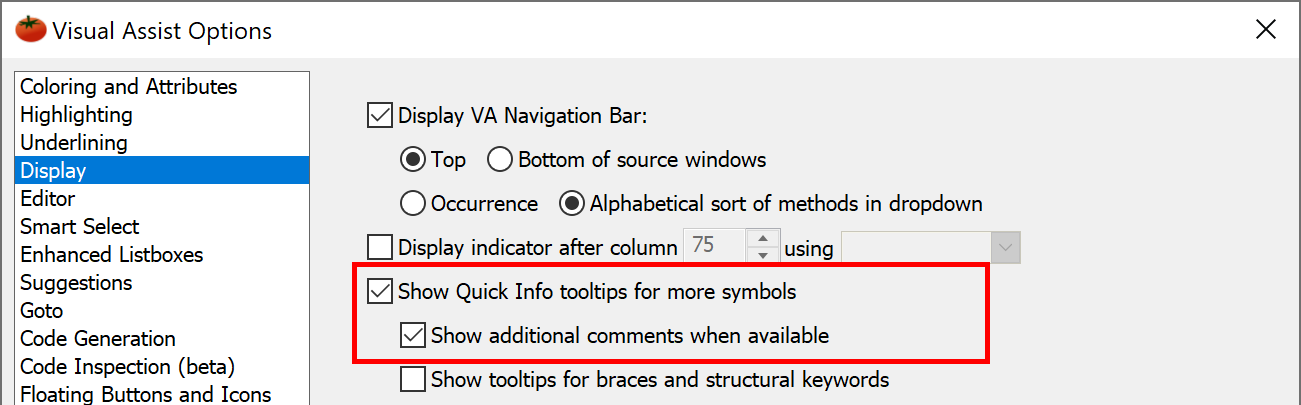
Visual Assist can add important information to tooltips when hovering over a symbol, such as comments from base classes. This is very helpful in UE4, as base class comments are the documentation.
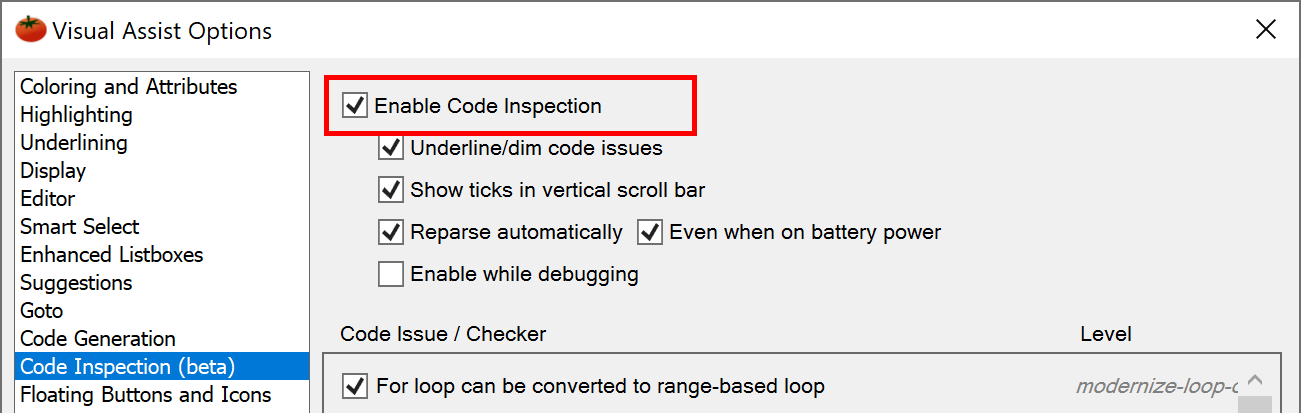
Visual Assist can analyze your code and suggest improvements. Enable Code Inspections to see blue underlines where code might be improved. Visual Assist can even modernize your code for you! We will show how later.
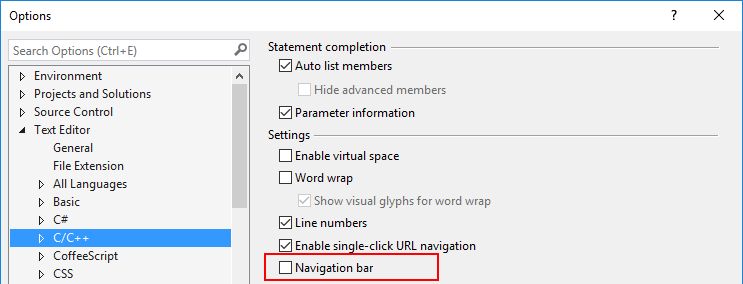
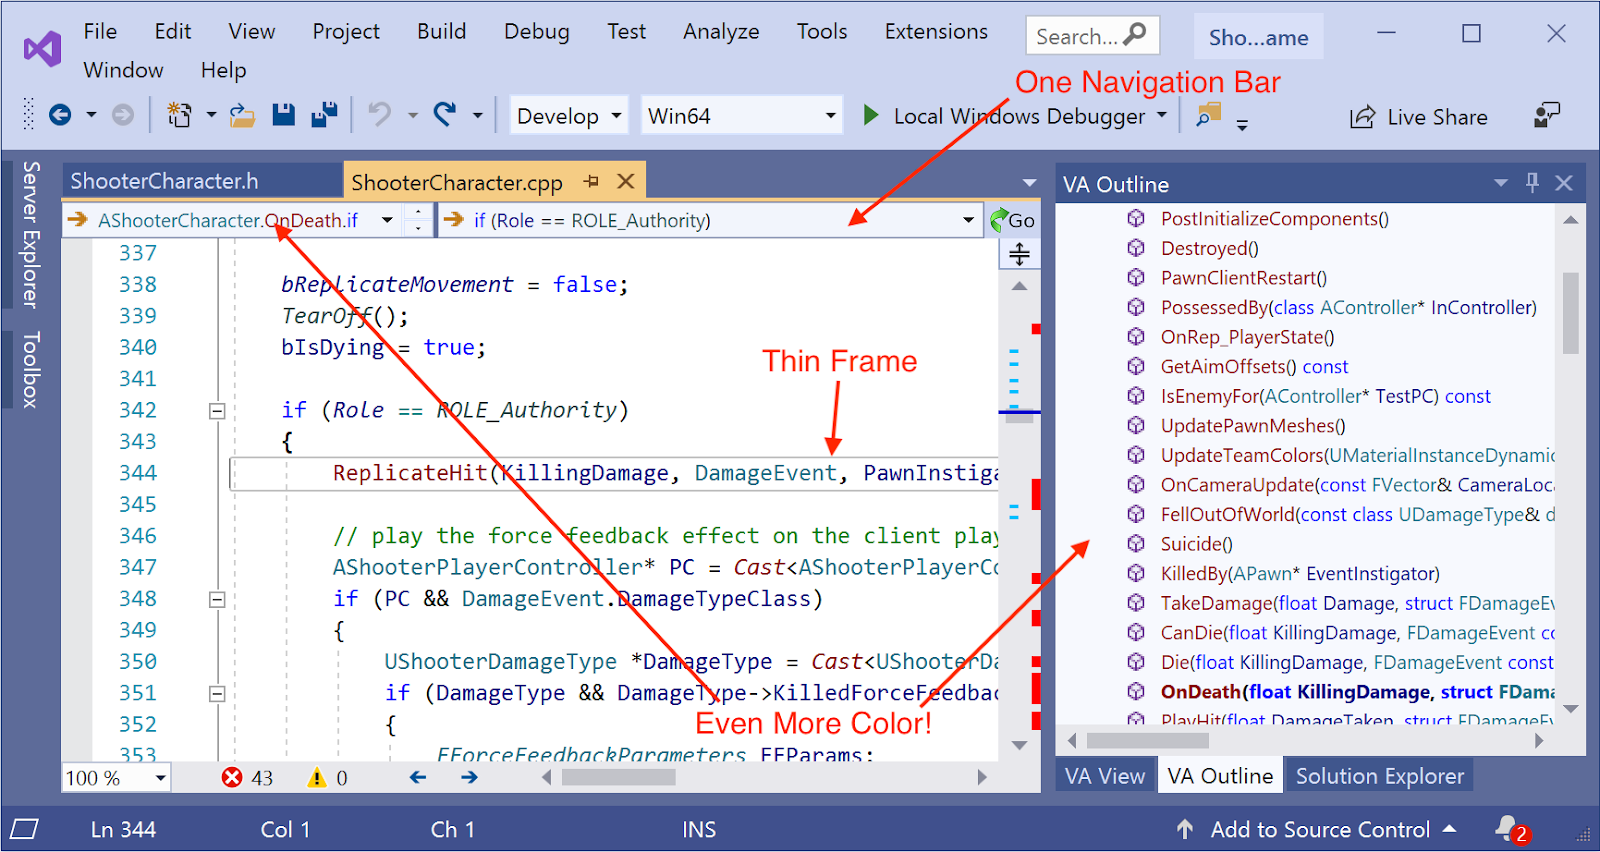
Then, open the options dialog to Visual Studio and eliminate the redundant navigation bar. The version in Visual Assist includes the functionality of the built-in one.
After making the changes, Visual Studio is ready to use.
5. Navigation in UE4
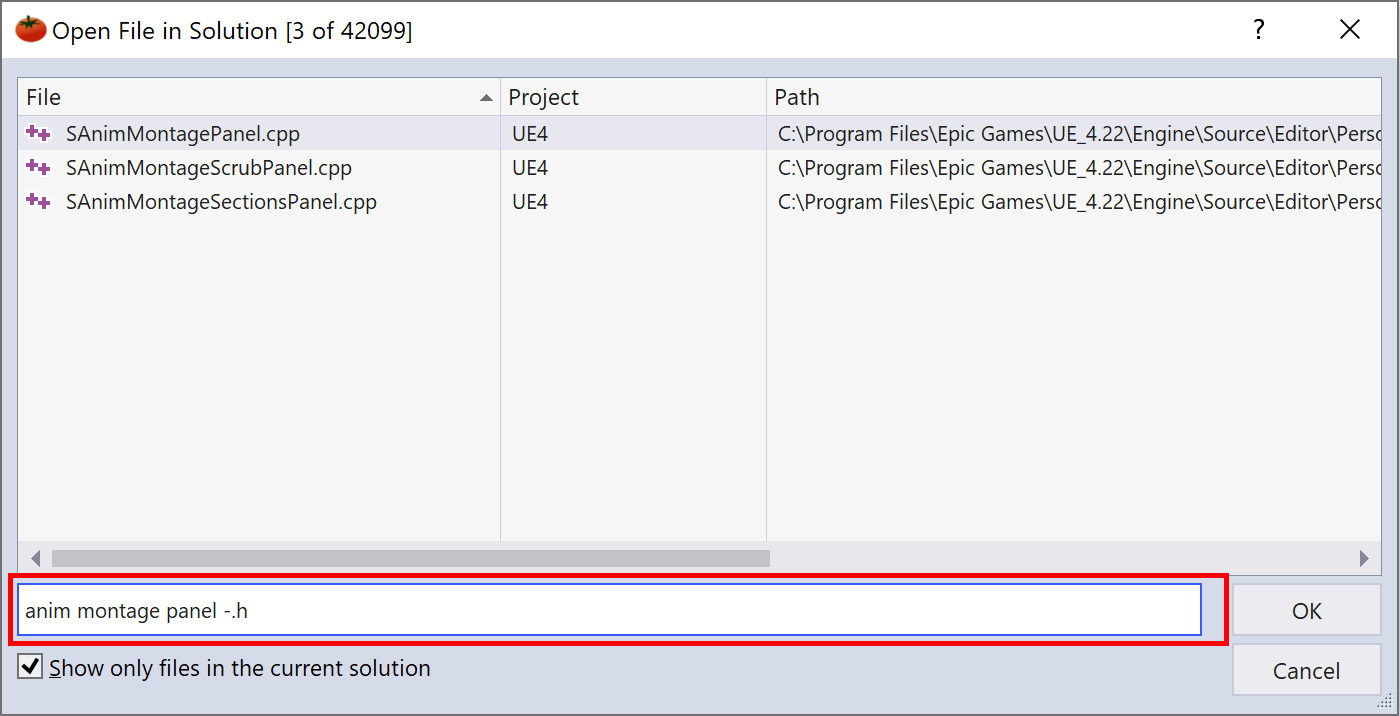
Search for and open files using Alt + Shift + O. Precede a search filter with a hyphen to exclude symbols (negative filtering).
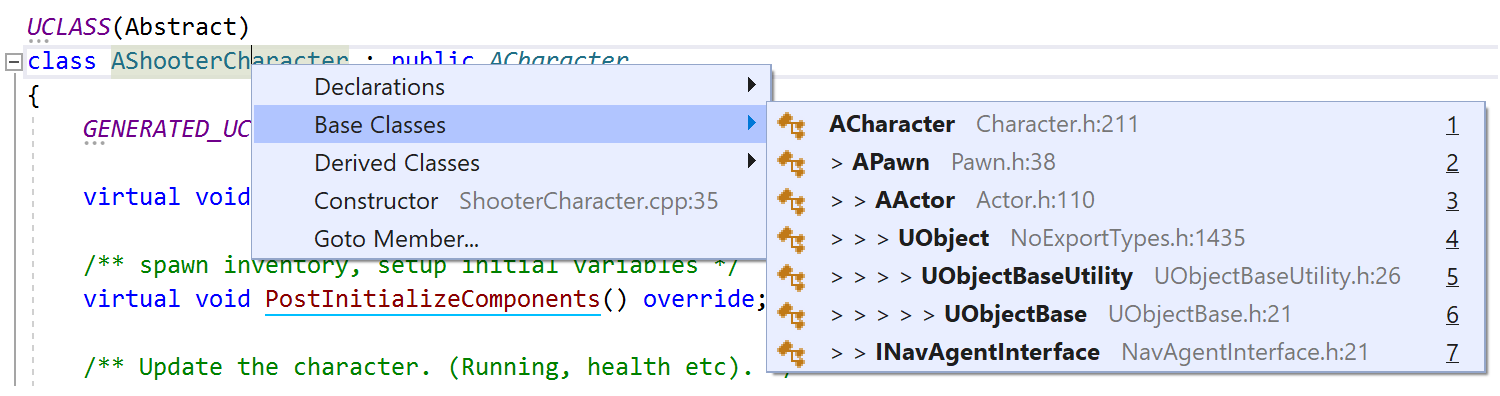
Understand and navigate the inheritance hierarchies of UE4 by using Alt + Shift + G on a class name. The Alt + Shift + G shortcut works on many types of symbols, try using it on a virtual method.
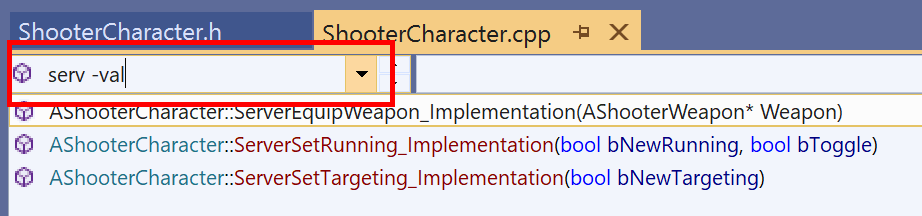
Source files in UE4 can be thousands of lines long. Use Alt + M to search for and navigate to methods inside the current file.
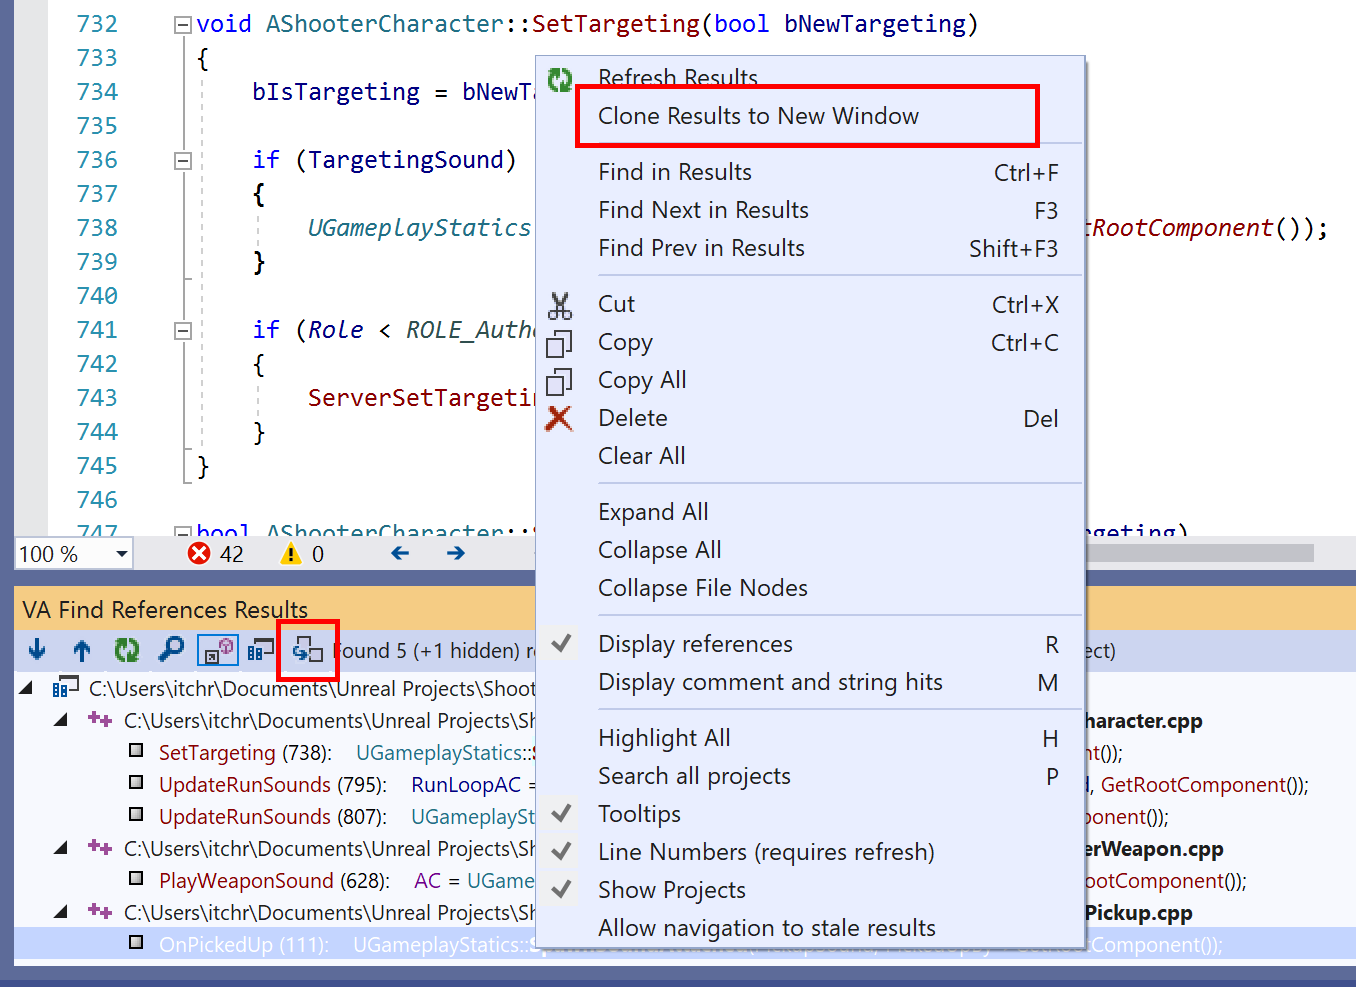
Find references to a symbol using Alt + Shift + F. Visual Assist’s find references is fast and accurate inside huge solutions like UE4. Try cloning your results to save them by clicking the Clone Results button or using the right-click menu.
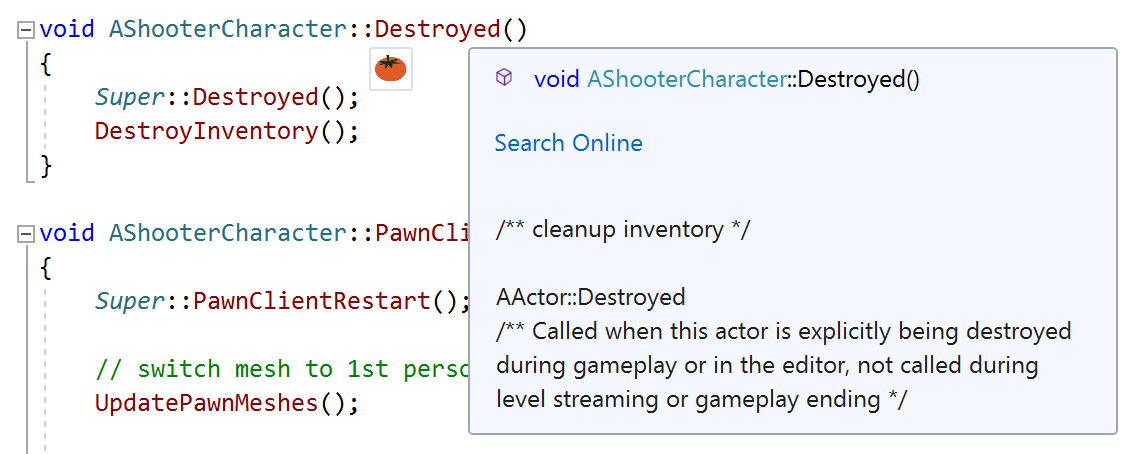
Hover over a virtual method to see comments from base classes. Base class comments often contain useful documentation.
6. Refactoring in UE4
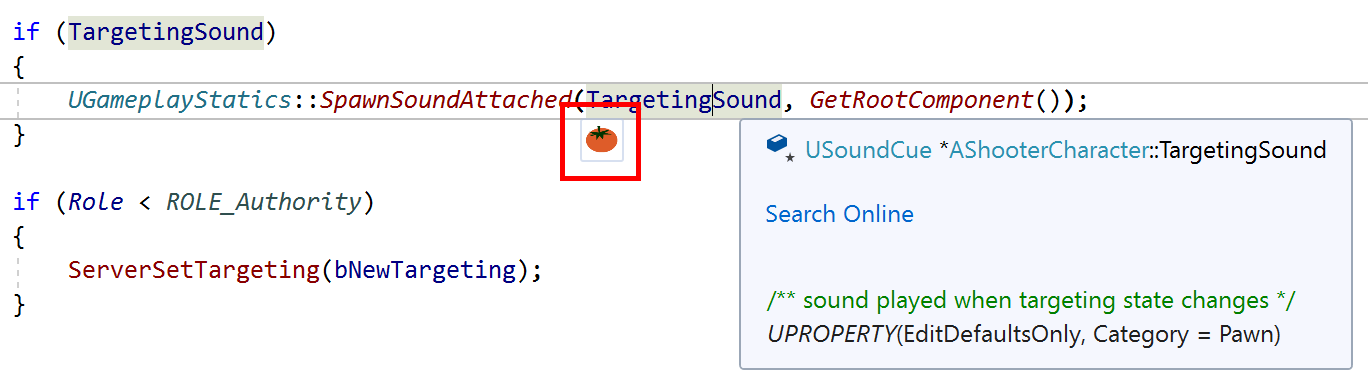
Access refactoring tools using the keyboard shortcut Alt + Shift + Q, or by hovering over a symbol and clicking the tomato icon that appears. The contents of the Alt + Shift + Q menu depend on the symbol.
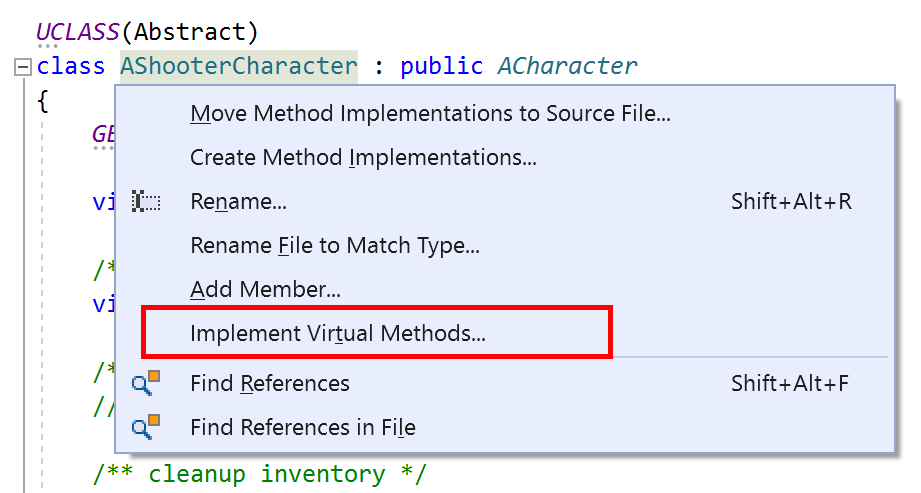
It is common in UE4 to override virtual methods, such as Tick or SetupPlayerInputComponent. Visual Assist can implement these methods for you. Click on your class name and then use Alt + Shift + Q.
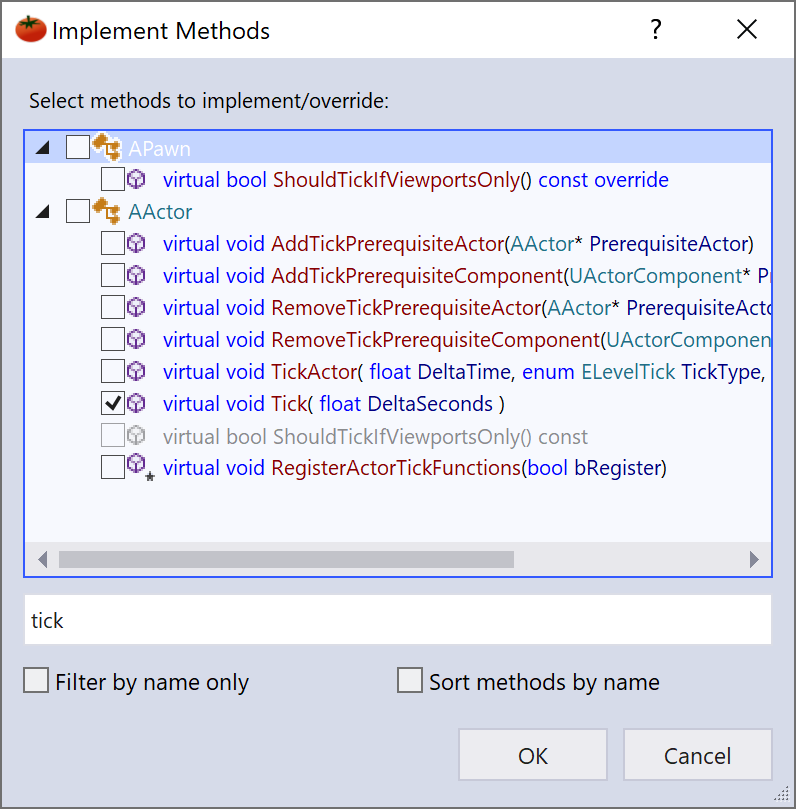
The Implement Methods dialog is searchable, and you can implement more than one method at once.
Visual Assist will intelligently add a call to the Super class version of the method for you when appropriate.


You will see blue underlines below code which could be modernized. This is Code Inspection.
Visual Assist can refactor the code for you! Use Alt + Shift + Q on the underlined symbol.

If you need to change the return type, parameters, or the name of a method you can use Change Signature. Edit the method definition in the window. References and call-sites to the method will be updated, so you won’t miss anything.

7. Tips
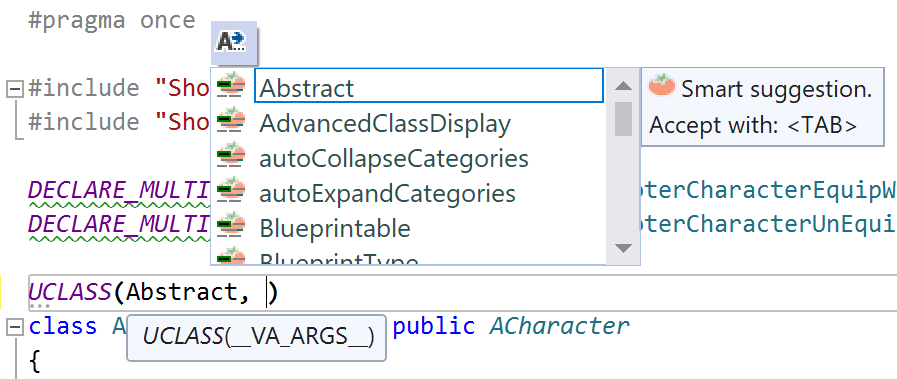
There is a lot of special functionality built into Visual Assist for UE4, such as suggestions for U* macros. The more you can use Visual Assist, the more opportunities to make your life a little easier in UE4.
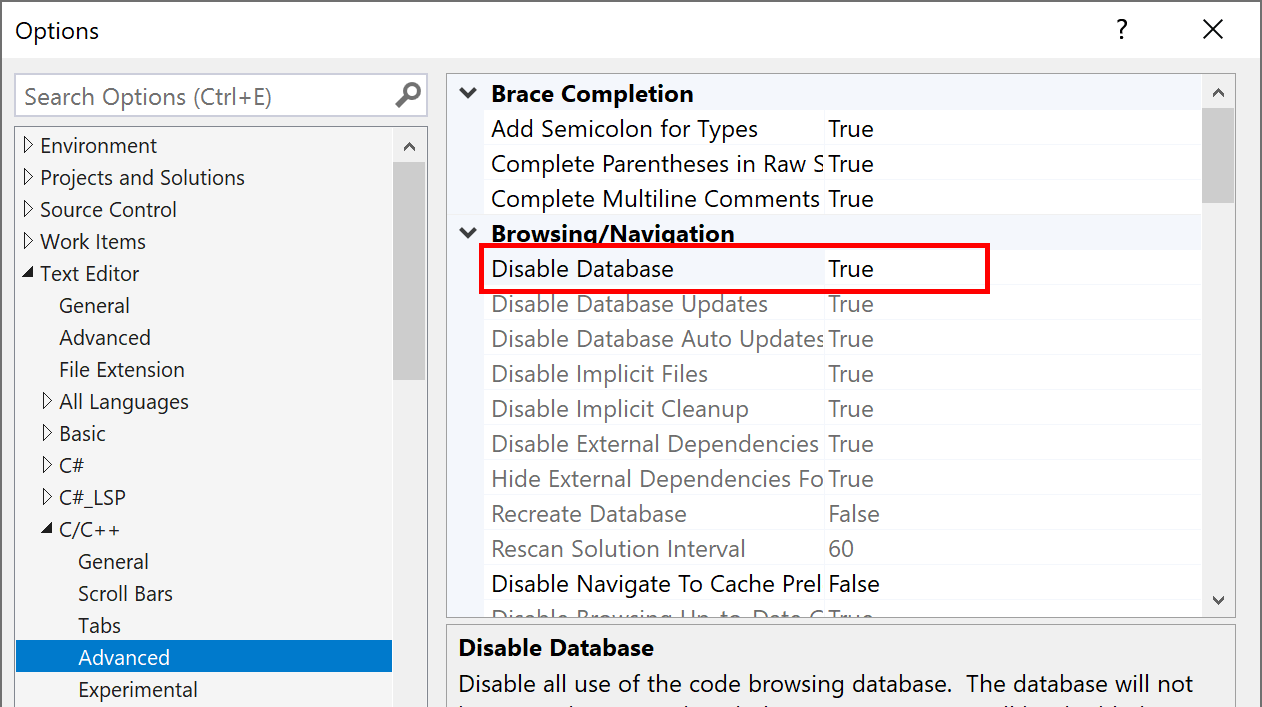
You may find the built in IntelliSense to be unusably slow, or that it often adds red underlines to correct code in UE4. IntelliSense can be disabled. Visual Assist provides all the intelligent tooling expected in a modern C++ development environment.
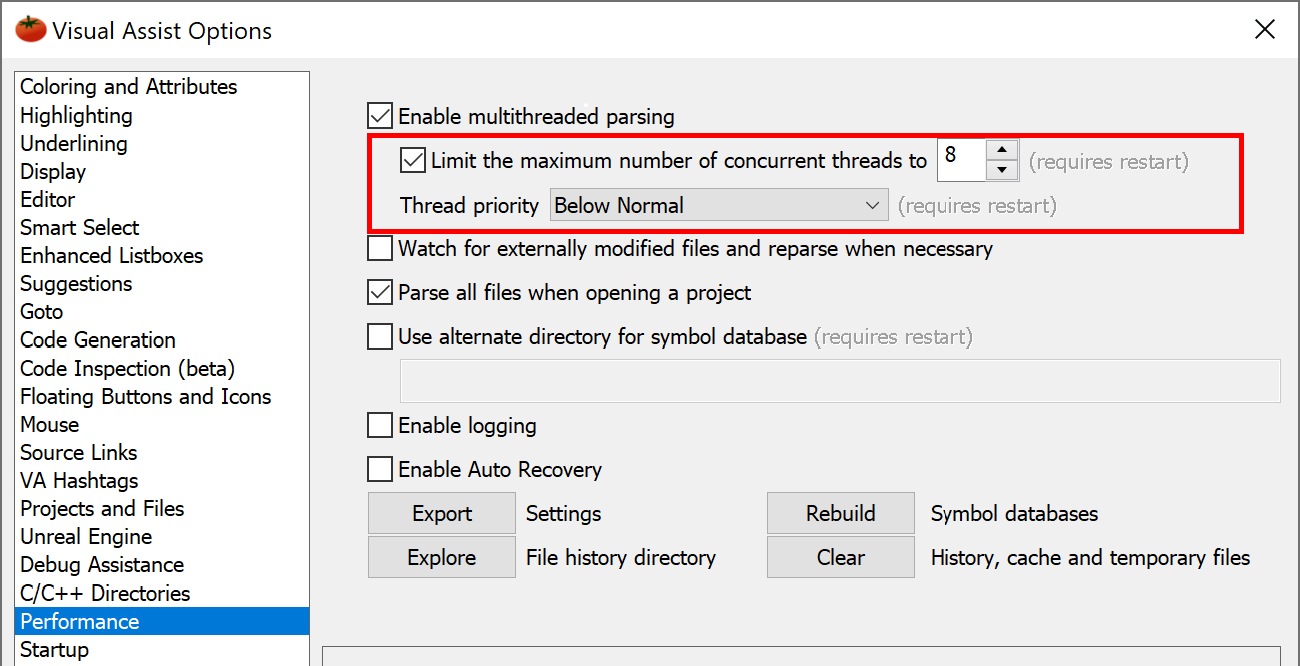
You can throttle the initial parse in the Performance tab of the Visual Assist options dialog. By default, the one-time parse uses all available resources to finish as fast as possible.
For more information or support check out our forum and documentation.
Some features mentioned above require the latest build, check here for updates.